For the Swift toolchain, the most important, and the only that matter is a path to a swift binary. Everything is deducted based on that path.
Structure
The Swift toolchain simplified structure is this:
└── swift-4.2-RELEASE.xctoolchain
  ├── usr
  │ ├── bin
  │ │ ├── lldb
  │ │ ├── lldb-mi
  │ │ ├── swift
  │ │ ├── swift-autolink-extract -> swift
  │ │ ├── swift-build
  │ │ ├── swift-build-tool
  │ │ ├── swift-demangle
  │ │ ├── swift-format -> swift
  │ │ ├── swift-package
  │ │ ├── swift-run
  │ │ ├── swift-stdlib-tool
  │ │ ├── swift-test
  │ │ └── swiftc -> swift
  │ ├── include
  │ └── ...
  │ ├── lib
  │ └── ...
  │ ├── libexec
  │ └── ...
  │ ├── local
  │ └── ...
  │ ├── share
  │ └── ...
One binary that stands out of the crowd, it's usr/bin/swift. Some other tools happen to be just a link to the swift executable. For example swiftc is a symbolic link to swift. Swift binary uses the concept of drivers - depends on the executable name, a driver is used, or another binary is executed. The most common are:
- swiftc
- swift build
- swift package
- swift run
- swift demangle
Swift Tools
I know that swiftc and swift are not the same tools. One is a compiler; the latter is an interactive shell. The name of the executable is checked in the runtime, and either REPL or compilation branch code is executed.
The swift-build, swift-package and swift-run binaries are actually part of Swift Package Manager subproject.
A general pattern is that swift binary will act as a proxy for other binary. For example, when executing swift somename command, it will be passed to swift-somename executable, eg.:
$ swift somename
> error: unable to invoke subcommand: /Applications/Xcode.app/Contents/Developer/Toolchains/XcodeDefault.xctoolchain/usr/bin/swift-somename (No such file or directory)
Based on the swift binary location, every other path can be built. The path to standard library for the toolchain, the path for the swift libraries and all needed resources. That makes the swift toolchain portable - in the sense in can be installed anywhere.
I may install multiple toolchains, one next to another, and by simply executing right swift binary (using full path). Here I have two swifts installed one next to another:
$ Toolchains/swift-4.2-RELEASE.xctoolchain/usr/bin/swift --version
> Apple Swift version 4.2 (swift-4.2-RELEASE)
> Target: x86_64-apple-darwin18.0.0
$ Toolchains/swift-4.1.2-RELEASE.xctoolchain/usr/bin/swift --version
> Apple Swift version 4.1.2 (swift-4.1.2-RELEASE)
> Target: x86_64-apple-darwin18.0.0
Installation
Installation of the toolchain is as simple as downloading the archive and unzip it locally.
macOS
The macOS version is distributed as a pkg archive, that can be extracted using xar tool eg.:
$ curl -O https://swift.org/builds/swift-4.2-release/xcode/swift-4.2-RELEASE/swift-4.2-RELEASE-osx.pkg
$ xar -xf swift-4.2-RELEASE-osx.pkg -C Toolchains/
$ tar -xzf Toolchains/swift-4.2-RELEASE-osx-package.pkg/Payload -C Toolchains/swift-4.2-RELEASE.xctoolchain
Linux
Linux archive is a simple tar.gz archive that I need to uncompress and extract, eg.:
$ curl -O https://swift.org/builds/swift-4.2-release/ubuntu1804/swift-4.2-RELEASE/swift-4.2-RELEASE-ubuntu18.04.tar.gz
$ tar -xvzf swift-4.2-RELEASE-ubuntu18.04.tar.gz -C Toolchains/swift-4.2-RELEASE-ubuntu18.04.xctoolchain --strip-components=1
that was easy, wasn't it?
Select current toolchain
On Linux, it's best to use the path to the swift binary, or add the path to the PATH environment.
On macOS /usr/bin/swift is just a stub that forwards invocations to the active toolchain.
This technique can be used with Xcode as well, although the toolchain installation for Xcode requires it to extract to a /Library/Developer/Toolchains/ directory.
Once installed, I can query for the toolchain tool path using xcrun:
$ xcrun --toolchain "Swift Development Snapshot" --find swift
> /Library/Developer/Toolchains/swift-DEVELOPMENT-SNAPSHOT-2018-10-03-a.xctoolchain/usr/bin/swift
or run it right away
$ xcrun --toolchain "Swift Development Snapshot" --run swift
Welcome to Apple Swift version 4.2-dev (LLVM aeaaca98ed, Clang 1ddef2249a, Swift 20bb815b62).
Type :help for assistance.
  1>
it is also possible to set the current toolchain for the current execution, byt modifying TOOLCHAINS environmental variable.
$ export TOOLCHAINS="Swift Development Snapshot"
$ xcrun --find swift
> /Library/Developer/Toolchains/swift-DEVELOPMENT-SNAPSHOT-2018-10-03-a.xctoolchain/usr/bin/swift
this affects xcodebuild too.
however, the toolchain name is less explicit than the full path (here, name is "Swift Development Snapshot") I found it less usable.
Bring Your Own Swift
Bootstrapping usually refers to a self-starting process that is supposed to proceed without external input. It is possible to design a project that uses different versions of swift for different parts of the project. By combining multiple toolchains together and by calling the swift binary from the different locations, I can bootstrap the entire project on a machine without any swift installed in the first place.
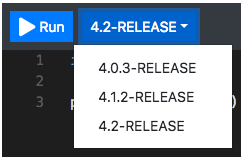
I did that for the online.swiftplayground.run the project that is an online Swift Playground that utilizes a few versions of Swift at the same time - to compile a code with a different version of the Swift it's enough to select it from the list. Internally it executes different toolchain using the techniques described above.

In particular: the server is built and run with Swift 4.1.2, while other dependencies use either Swift 4.0.3, 4.1.2 or 4.2.
To build an environment, I've created a bootstrap.sh script that downloads and extracts the toolchains, that later are used by the run.sh script.
Thanks to this approach, it's enough to clone the repo and run it, to have the runtime and development environment ready to use.
PS. If you think now: this is great for a Docker - I agree. This is great for a Docker installation.